Tutorial: Scrappy Stars Hexie Pillow
- 24 – 2″ squares (scrappy or choose a palette and focus fabric)
- Background fabric:
1 strip measuring 2½” x WOF, subcut into 6 diamonds using the template
2 strips measuring 4″ x WOF - 1 fat quarter for pillow backing
- Needle and thread
- Polyfil for stuffing
Fabric placement and color is important to this pillow design. My test block used a traditional 4-patch with repeated prints set diagonally to each other. I decided that this block would look better with a scrappier feel, but kept the mini diamonds in the same fabric.
Let’s start sewing!
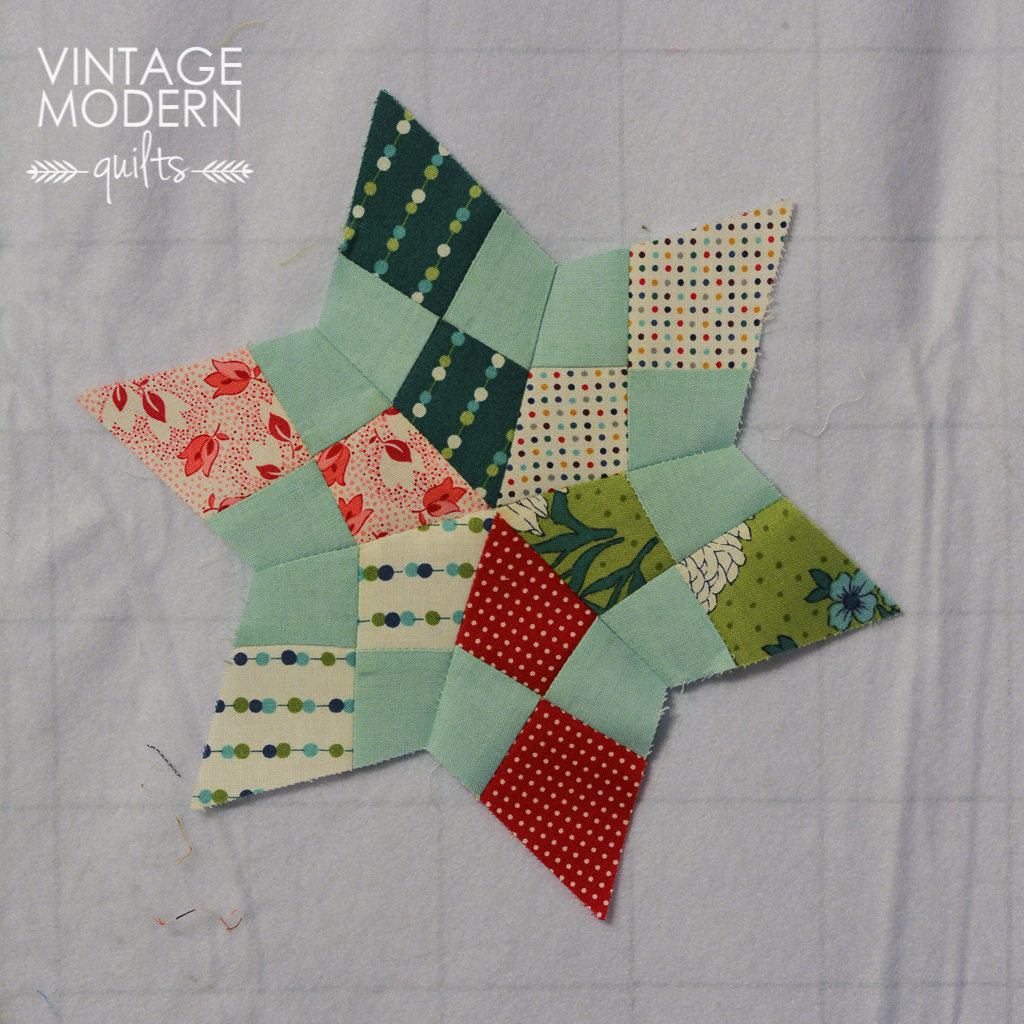
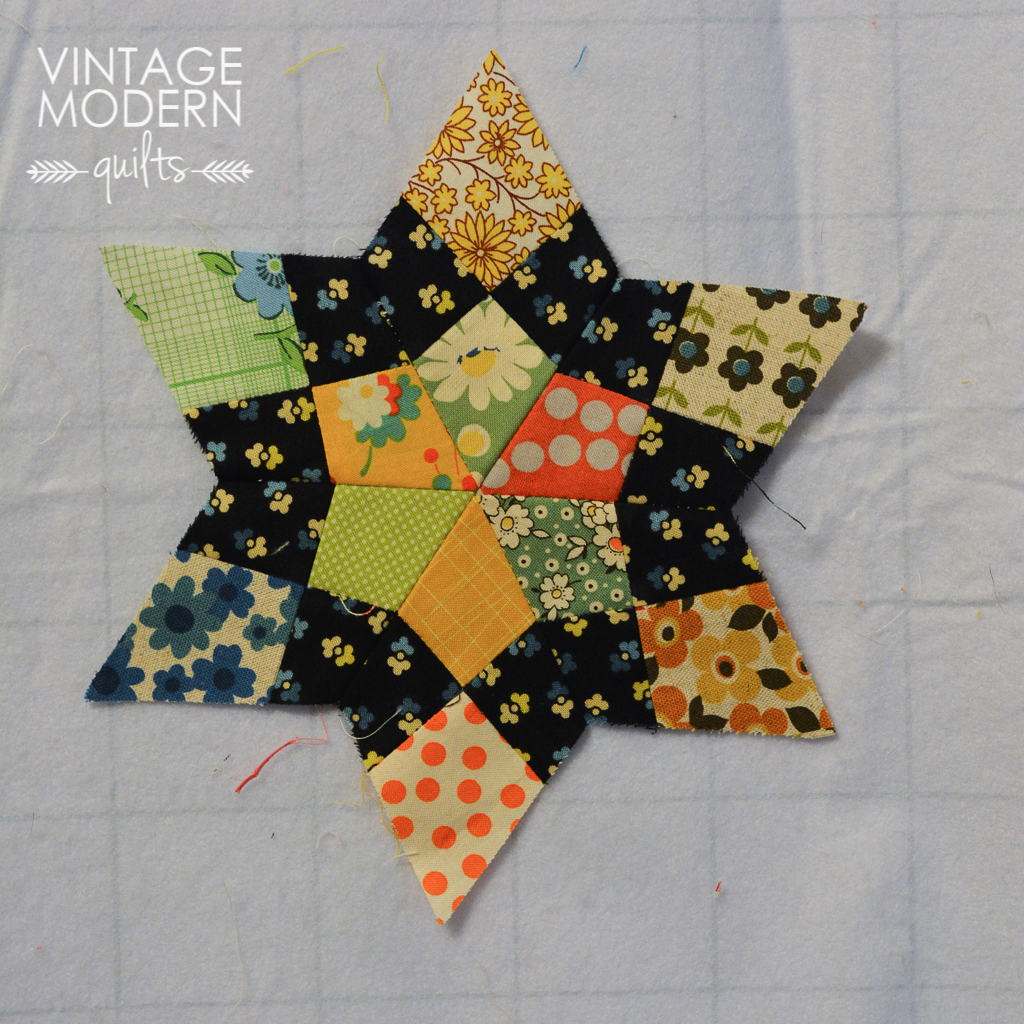
1. Create 4-patch units from your 2″ squares – you will need a total of six 4-patches. Press and starch the 4-patches.
2. On the wrong side of each 4-patch. draw a line from corner to corner with a pencil or washable marking pen.
3. Line up the diamond template along the line and use a rotary cutter to trim off excess fabric.
4. Piece together the 4-patch diamonds to create a six-pointed star. Starch and press.
5. Piece the background diamonds the the star. Yes, these are y seams but don’t be intimidated. The key is the start at the outer point of the star and stop sewing a scant ¼” from the edge of the background diamond. If your patchwork foot has ¼” markings that makes it super easy to know when to stop, but you can also mark the stopping points. Then flip the diamond and start sewing up the edge of the adjacent star point. Starch and press once you’ve sewn all six background diamonds.
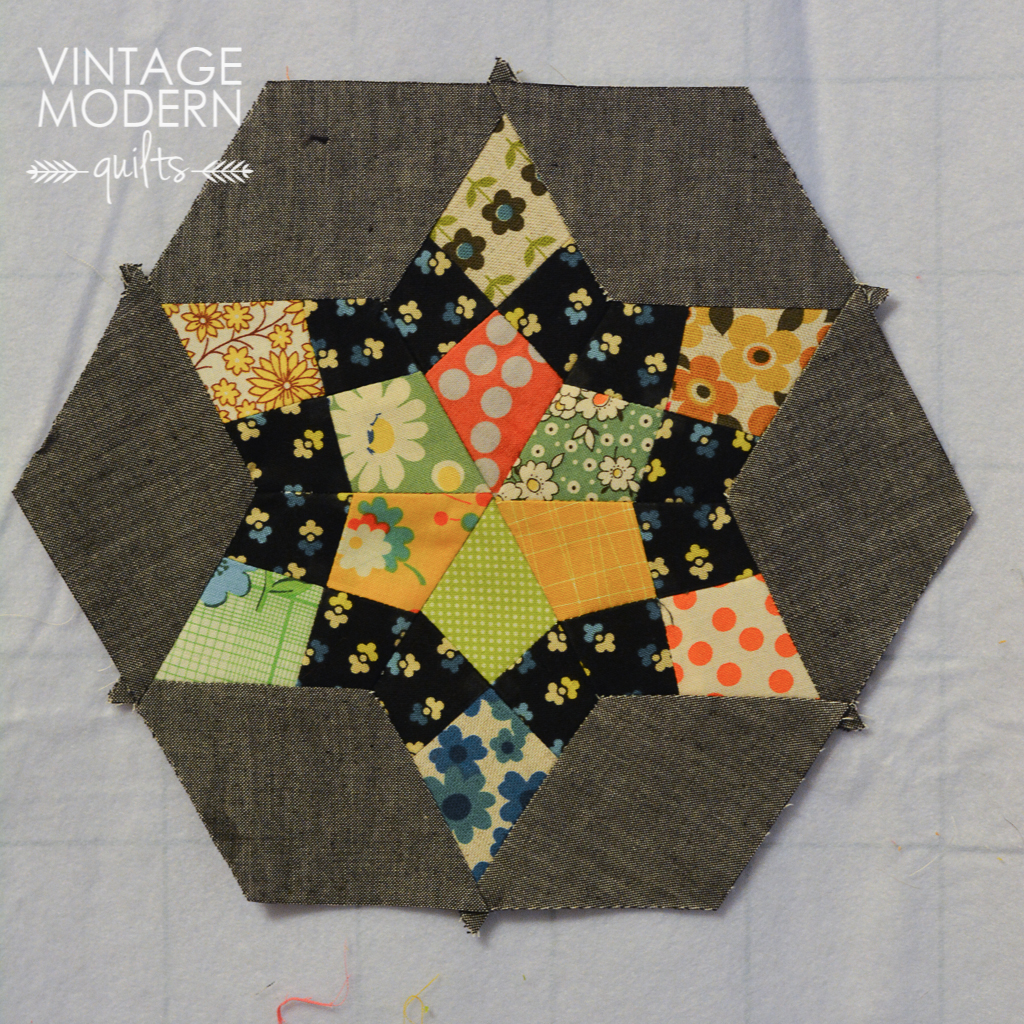
6. Now we are going to use our 4″ strips to make this hexagon shape a bit bigger. My finished pillow measures 17″ across at the widest point. If you want a larger pillow, cut these strips wider than 4″ (but this will affect the size of the backing fabric you’ll need). Line the raw edge of a strip along the edge of the pieced hexagon and sew together. Press and starch. Use a ruler to trim up the overage to match the adjacent edge.
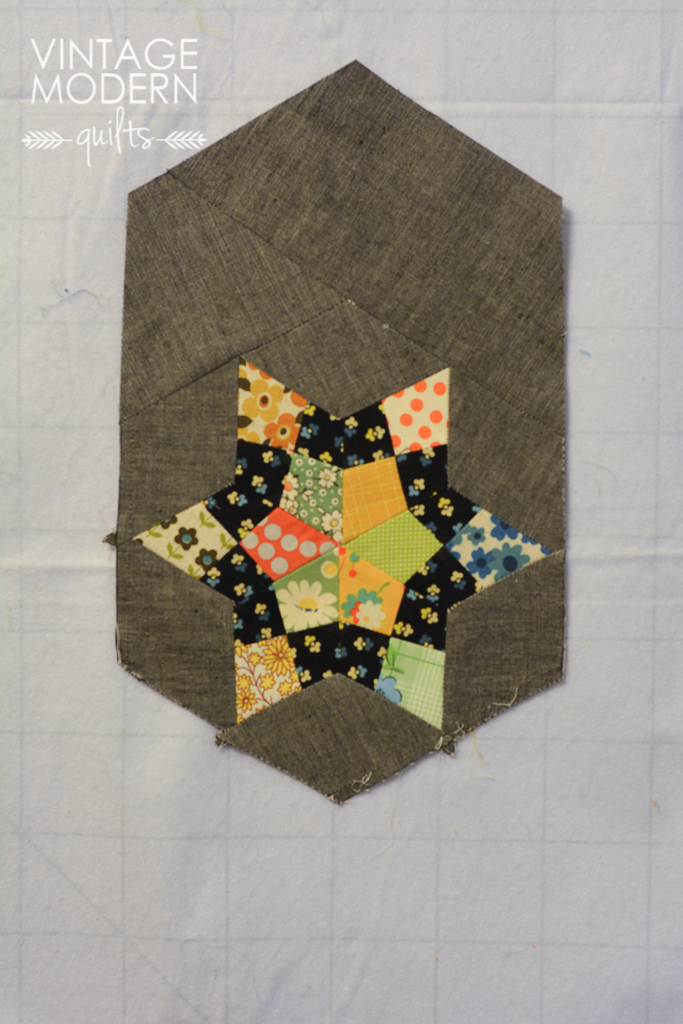
The above photo shows my hexie after I’ve added 4″ strips to two sides and “squared up” (really hexied up makes more sense!). Repeat this process until you’ve outlined the pieced hexie with background fabric.
7. Trim the fat quarter backing to match the front hexagon shape. Place right sides together. I like to put two pins in to remind me to leave an opening – one marks the start point and the second pin tells me to stop sewing. Turn pillow right sides out and press.
8. Stuff with polyfill and blind stitch closed. All done!
Eventually the filling will become lumpy and you can either open it up and re-stuff or turn it into a mini quilt (that’s probably what I’ll do).
Thanks for stopping by today! I hope you enjoyed my project. Here are the other stops on the Pillow Collective:
- Amy Ellis
- April Rosenthal
- Lisa Calle
- Natalia Bonner
- Megan Bohr
- Amanda Woodruff
- Heather Valentine
- Amy Smart
- Vanessa Christenson
- Maureen Cracknell
- Amanda Jean Nyberg
- Dana Bolyard
- Christina Lane
- Heather Bostic
- Audrie Bidwell
- Amanda Herring