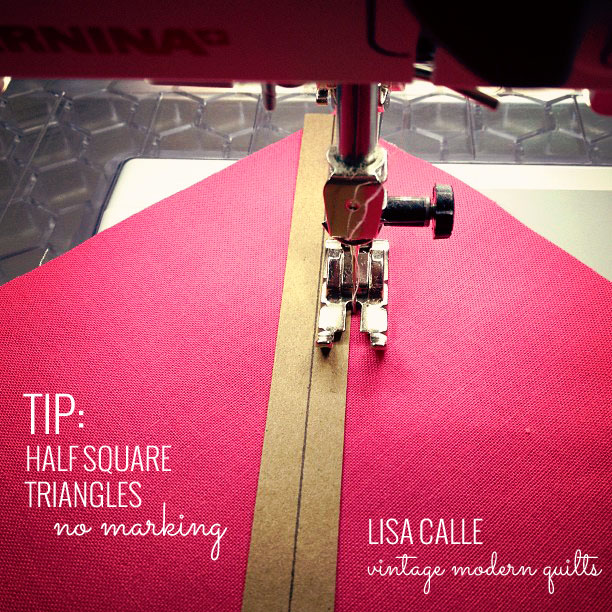
Tip: Half Square Triangles
I have a big stack of half square triangles (HSTs) to sew today, and I remembered a trick I saw on Pinterest a few months back. (Here is the original pin.) It doesn’t give the full details for HSTs so I figured out my own method and thought I’d share it here.
1. Find a piece of thin cardboard that is as long as your squares from point to point. I used a piece of Kraft paper.
2. Use your rotary cutter and ruler to trim a 1/2″ wide strip from your cardboard.
3. Use your ruler and a pen to find the center of the strip (a 1/4″ from either edge) and mark a line from end to end.
4. Line your HST squares together and place the strip from point to point. Sew right at the edge of the strip.
NOTE: This method works perfectly if you are making a quilt top that exclusively uses HSTs. But if your quilt top uses HSTs within a block, you need to make a small adjustment to achieve a scant 1/4″ seam. After you mark the center line of your strip, take your ruler and line your 1/4″ mark up exactly with the line…then shift it slightly so that the 1/4″ mark on your ruler is just to the left of the drawn line. Then trim off the excess (which is hardly anything, but that’s your “scant” 1/4-inch).
Tada! Perfect HSTs…no marking. I sewed my entire pile one way, trimmed them apart, and sewed the other side of the strip. Then cut your HSTs in half and press. So much better than marking each piece, right?

